Macaroni and Cheese

macaroni

I hope that I’m not the only one that gets my dinner inspiration from the Food Network.

Anyone….?

Just me….?

Well I’m glad I got that out of the way.  I made probably the biggest mistake in Food TV…I broke (my) cardinal rule #1…Don’t watch the Food Network while hungry.

So here I was, watching the TV show “The Best Thing I ever Ate…Comfort Food” while hungry, and on the screen came this picture of glorious Macaroni and Cheese.  I love Macaroni and Cheese.  It’s gooey, cheesy, comforting, and just all around dang yummy.  There was absolutly no way I could go the rest of the day without having Macaroni and Cheese (and it being 6:30pm, I had to get on it).  I went to my trusty Pioneer Woman food blog (www.thepioneerwoman.com), found her recipe for Mac and Cheese (just to get proportions right) and tweaked it from there.  She added an egg…brilliant!  I should add an egg for myself.  I’ve never added egg into my cheese sauce, but I will for the forseeable future.

*Note* – I scaled the recipe down pasta wise for 1 person, but I wasn’t able to use 1/4 of an egg, so I made a bunch of sauce.  I’ll use the “correct” proportions below.

4c dried macaroni pasta (I used shells because it’s what I had on hand)

1 beaten egg

1/4c butter

1/4c flour

2 1/2 c milk

1/2t dry mustard

1/2t cajun seasoning

1t ranch dressing mix (please stay with me here…)

1lb cheese (I used a mixture of cheddar, jack and mozarella.  What can I say…I was cleaning out my fridge).


Cook pasta to package directions and drain.  Meanwhile, cook butter and flour in a skillet over medium-low heat and “cook” for 5 minutes.  Add milk and whisk to break up any lumps and cook until thick (about 5 minutes).  Take 1/4 c milk sauce and slowly drizzle into the egg while whisking the eggs to temper the eggs.  Once the eggs have tempered, add back into the milk sauce and stir in.  Add cheese and let melt together.  Add mustard, cajun and ranch and stir until melted together.  Add in pasta and stir to coat.

You can eat it as is, or you can add breadcrumbs and cheese to the top and bake in the oven.

How yummy!


Posted in Uncategorized | Tagged , , , , | Leave a comment

Slow Cooker Refried Beans

This recipe was inspired by a slow cooker refried bean recipe I found on Aunt Peg’s Recipe Box (http://auntpegsrecipebox.blogspot.com/2012/04/crockpot-refried-beans.html) but I kind of ran with it. My friends and I do Taco Tuesday EVERY Tuesday (and by every Tuesday, I mean we’ve only missed tacos on Christmas and a friend’s college graduation we all attended). For tacos, we usually have to go for sheer quantity because we can have anywhere from 6-26 people show up. The beans we usually use are a dried refried bean from the bulk food area of Winco, and they’re pretty good (defiantly better than the canned stuff).

Every so often though we mix it up (homemade taco seasoning, salsa chicken, pork, carne asada, the possibilities are endless). Homemade refried beans was my idea of mixing it up this week. Here’s what I did:

2 c rinsed refried beans

6 c water

1 onion, quartered

1 jalapeno, seeded and chopped

3 cloves minced garlic

1 1/2t Salt (this may seem like a lot, but the beans need help)

1t pepper

1t chili powder

1t cumin

Throw the entire party into a 5-6 quart crockpot and let it go for about 8 hours on low. Take out the onion and drain some of the liquid (but keep in case you need to add some of the liquid back to the beans). Mash with a potato masher, adding liquid back as needed for consistency. Then add a swirl of Sciraccha sauce.

*Sidenote* yes, I know Sciraccha is an Asian condiment, but trust me on this. We use Sciraccha in our dried refried beans, taco meat, salsa, etc… It adds an interesting depth of flavor and a little heat. And by adding a swirl, just make a round of the Sciraccha on top of the beans. Not too much, not too little.

Check the seasoning. I added about another 1/2t salt, few grinds of black pepper and some taco seasoning. Just season to your preference. Make sure to keep the liquid on the side because we found that the beans dried out fairly quickly, but a quick splash of the cooking liquid fixed it all.

Enjoy!

Posted in Uncategorized | Tagged , , , , | Leave a comment

Chicken Fried Steak

Two Seahawks away games mean two brunch games!

My game day friends and I have a particular hankering for Chicken Fried Steak.  What can I say – it’s so yummy!  It’s the first time I’ve made this, and I must say it turned out pretty darn good.  Of course there will always be improvements.  I felt the gravy didn’t have as much “oomph” (and yes that’s a real word thank you very much) as I wanted it to.  The recipe posted is inspired by The Pioneer Woman chicken fried steak recipe, but with a twist (original: http://thepioneerwoman.com/cooking/2011/02/chicken-fried-steak/ )  I’m going to post what I actually did with comments on what I wish I did.  Rest assured, this will be a repeat

Chicken Fried Steak

4 pieces of cube steak (about 2.5-3 lbs)

1.5 cups whole milk (plus up to 2 cups for gravy)

3 1/3 cups flour

2 eggs

seasoning salt

cayenne

black pepper

canola oil

salt/pepper

Directions:

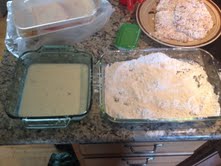
In a shallow baking dish mix the 1 1/2 c milk and eggs together and add few dashes of seasoning salt.  In a second shallow dish mix together3c flour, cayenne, seasoning salt and pepper to taste (Don’t worry about over seasoning it; I wish I went heavier with the seasonings)

*I wish tip #1* fry some bacon or cook breakfast sausage in a cast iron skillet.  Transfer cooked meat onto a plate but keep the grease separately.  Add oil to the skillet and re-heat back up on medium..

cfs1

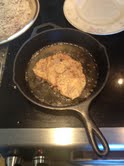
Make an assembly line for the steak.  Egg – Flour – back in the egg – back in the flour, then in the pan of hot oil.  Cook for about 2 minutes a side or until nice and brown

cfs2 cfs3

Once all the steaks are fried, add back in the grease from previously fried bacon and/or breakfast sausage (1/4 cup total).  When heated back up, add remaining 1/3 cup of flour and whisk together to cook until it starts to turn golden brown.  Add in milk (start with 1 cup) and whisk until it thickens.  Keep adding milk until the gravy has reached the desired consistency.  If you made breakfast sausage, add it back in, make sure to season with salt and pepper to taste and let it cook for 5-10 minutes.

Posted in Breakfast | Tagged , , , , , | Leave a comment

Mexican Egg Puff

Q: What’s better than Sunday brunch?

A: Sunday brunch while watching the Seahawks!


One of my favorite parts of being a fan of a West Coast NFL team is the early away games.  Very rarely Seattle teams will travel somewhere in the same time zone, so usually we’re all perched on our respective couches drinking mimosas by 10am.  One advantage early games have over late games is the breakfast spread.  Today, we did biscuits and gravy, bacon (mainstay for any game…period) and I brought Mexican Egg Puff.

I have no idea where this recipe comes from.  My mom made it for Christmas morning a few years ago, and we all fell in love.  It then made an appearance at Easter, birthdays, the next Christmas, work breakfast potlucks, and the list goes on.  The great thing is that it’s so flippin easy and easy to make ahead of time.  You can control the spiciness by adding jalapenos instead of green chili’s, make it a meal by adding diced ham, the possibilities are endless.  


Mexican Egg Puff

10 eggs

1/2 c flour

1t baking powder

1/2t salt

16 oz container of small curd cottage cheese

4.5oz can diced green chili’s

1lb shredded Monterrey jack cheese

1/4c melted butter


Melt butter in the bottom of a 9×13 baking dish.  Mix remaining ingredients in a bowl and pour into the baking dish.  Bake at 350 for 35 minutes.

*Make ahead tip* Mix the ingredients in a bowl and cover with foil and put in the fridge.  When ready to bake, melt the butter and pour into the baking dish and bake as directed.

Posted in Breakfast | Tagged , , , , | 1 Comment

Grilled Peaches with Cinnamon Butter

Did I take any pictures for this post?

No.

After making the stout steaks (previous post) at a friends house over Labor Day weekend, I was in a hardcore food coma.  But then I remembered I brought dessert fixings.  Back to BBQ I trotted (no beer in hand this time).

Grilled peaches are one of my favorite summertime deserts.  They’re light, fresh and have that lightly bbq’d taste to them.  Here’s the recipe:

4 ripe peaches, pitted and halved

1 stick unsalted butter, softened

2T sugar

1t cinnamon (or more depending on how you like your cinnamon sugar)

Mix the butter, sugar and cinnamon together in a bowl and set aside

Lightly brush the peaches with a flavorless oil (like canola or vegetable)

Place the peaches flesh side down on a grill on high heat until cook through and golden brown with grill marks.

Flip the peaches upside down and make an cut an “x” into the flesh.  You don’t want to go all the way through the peach.

Spoon and spread the butter mixture on the flesh and continue to grill for about minute until the butter melts into the “x” you cut and gets even better than you could ever imagine.

Posted in Sweet Spot | Tagged , , , | Leave a comment

Stout Steaks with BBQ Sauce

It might surprise the people that know me that I’m actually a huge fan of diverse beers. My mainstay at BBQ’s and bars is either a Rainier (old trusty) or Bud Light, but I enjoy all kinds of beers (except for IPA…but that’s a different story). Over Memorial Day, I had planned BBQ evening with a good friend of mine. He provided the BBQ and beer (PBR, but being non-discriminatory, free beer is good beer), and I provide the steaks and mayo-less potato salad (I’ll try to remember to post about the German potato salad I made…TDF)!

I whipped up these steaks, let them marinate for 8 hours, threw them on the grill and the muffled groan from my friend told me that they turned out alright. I don’t use a recipe for my steaks. I like to play around with the flavors and what I have available. Below is what I used and my comments:

Image

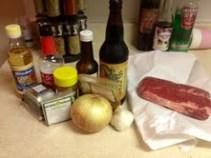
  • 22 oz bottle of Elysian Brewery Dragonstooth Stout – This is one of my favorite stouts. If this isn’t available in your store, you can substitue another stout. I like the craft stouts versus the mass produced stouts
  • Image
  • 2 ribeye steaks – PLEASE PLEASE get these from a butcher if you have the option.  I was never a huge fan of steaks until I tried a steak from my local butcher D&D Meats.  It changed my life.
  • 1 yellow onion, coarsely chopped
  • 5 cloves garlic, crushed
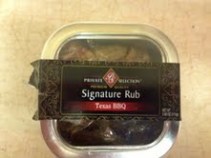
  • Steak Rub – I use this one.  I like it because it has a bunch of yummy spices in one place.  You can use your favorite.  I try to use one that isn’t salt so you can control the salt of the marinade
  • Image
  • Image
  • Soy Sauce
  • Worcestershire Sauce
  • Rice Vinegar – just trust me on this…
  • Johnny’s Seasoning Salt
  • Dried mustard
  • Cayenne pepper
  • Brown sugar (about 3T)
  • Black pepper

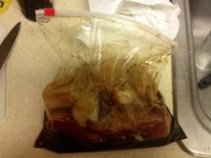
The best part about this marinade is you  just throw it all into a big freezer bag.  When putting your ingredients into the bag, save about 3/4C beer, ½ onion and 2 cloves of garlic.  Let those puppies marinade for however long you want (at least 4 hours but the longer the better.

Image

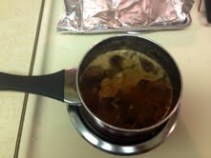
In the meantime, make the BBQ sauce.  In a saucepan, simmer the remaining beer, garlic and onion together.

Image

-PLEASE NOTE- the beer will foam over as the carbonation is heated.  Keep an eye on it and stir, remove from the heat when it starts to foam until it dies down, then return to the heat, and repeat.  Eventually it’ll stop foaming. 

When it does, simmer it for about 15 minutes until reduced.  When reduced, remove the onion and garlic and add in brown sugar, ketchup, Worcestershire Sauce, Soy Sauce, Johnny’s seasoning sauce and pepper until you get to a flavor you like.  I usually start with a few spoonfuls of the sugar and ketchup then some dashes of the rest until it gets to a flavor I like.

COOKING THE STEAK:

I like my steak a good medium-rare; about 6 minutes a side.  I have to confess though, I usually time my steaks by drinking a beer.  1 can of Bud Light or Rainier = 1 side of steak.  When you put the steak on the grill, grill for ½ time before turning them 45 degrees so you get the beautiful grill marks.  I also brush some of the sauce on during the cooking.  Flip, repeat then REST THE STEAKS.  Please rest the steaks.  Nothing makes me sadder than cutting into a steak fresh off the grill.  The steaks need time for the juices to re-distribute (plus it’ll be really hot).

Did I get any pictures of cooking the steaks?  Of course not.  Between having my friends hover over me BBQ’ing, drinking my beer to make sure I get proper cooking time, and running back and forth from the kitchen, it slipped my mind.  But trust me, they were beautiful.

Posted in Dinner | Tagged , , , | 1 Comment

Raspberry Mango Mint Sorbet

It finally hit summer here in Seattle!  It got up to the low 90’s this last month, and has been in the 80’s for about a week or so.  I know, I know, there’s other places in the country hotter than this, but it hits the 90’s maybe once in a blue moon.  

I went to a friends 4th of July BBQ awhile ago, and I was trying to think of something creative to bring.  I already brought the previously blogged about Mexican Dip (I’ve been instructed to bring it to every BBQ going forward), but I wanted something different.  Dessert!  Brilliant!  But what to bring…I don’t want to bake anything.  Ice cream?  Brilliant…but I don’t have an ice cream machine.  An ice cream machine is on my “wish list” that my 550 sq ft apartment just won’t allow (also on that list is a stand mixer, bread maker, deep fryer, and the list goes on).  

I was reading the latest issue of my Real Simple magazine, and they had a recipe for a no churn sorbet.  That’s it!  That sounds easy enough.  Frozen fruit, sugar, salt, and a food processor.  

Problem #1: My food processor has a capacity of about 1 cup…this could take awhle

Problem #2: I have the patience of a 7 year old child

Problem #3: Now I Really Really Really wanted sorbet

*quick cut to Menchies to get some frozen yogurt to quell my cravings while I ran to the store*

I used rasberries and mangos, but you can pretty much use whatever fruit you like.  Strawberries would be amazing, blueberries even better!  You can also use fresh berries as well. 

This sorbet was delish!  It was a little “icier” than I expected, but it was still yummy.  It freezes pretty rock hard; I let it thaw for a bit and stirred every so often and it was perfect. 

Tip: It also tastes absolutly amazing to add some sorbet into a tall glass, add rum and Sprite.  I only think we ate the sorbet by the spoonful the first few bites.  The rest was used as a vehicle for the rum.

Recipe

2 bags frozen rasberries

1 bag frozen mangos (thawed for a bit so they’re not as hard as a rock)

Small bunch of fresh mint leaves (about 5 leaves)

1/4 c sugar (more/less to taste)

Pinch Salt

Rum (for the adventurous drinkers)

Blend the rasberries and mangos in a food processor until broken apart.  Add sugar, salt and mint leaves and process for an additional 10 minutes.  Freeze and enjoy!

Posted in Sweet Spot | Leave a comment

The BEST Mexican dip

I have a confession…I LOVE party food!  Finger food, dips, small plates, shareables; each one of them has a place in my heart.  There’s nothing more versatile than Mexican dip.  It’s simple enough, no cooking required, and it gets better as it sits in the fridge.  Everyone loves it, most of them have the same base (beans, cheese, salsa, etc…), but this one (my absolute favorite BTW) has a secret zesty sauce with a secret ingredient…mayo.  Don’t run away!  I promise this is good.  I have converted non-mayo lovers from around the greater Seattle area with this wonderful dip.  In fact, I’ve even used the creamy layer as a dip all by itself.

This dip recipe has been floating around my family as long as I can remember.  Each party my parents through when I was growing up, the big platter would be brought out from the top cabinet, and I immediately knew I was in for a treat.  The first time I made it for my group of friends was this last Halloween Party.  The Facebook invite said, “Bring food!”, and I spent the next day running through a mental list of what I could bring.

*Sidebar* I absolutely love sitting on the couch reading cookbooks.  If I ever say I was just “Sitting around looking at a cookbook”, I absolutely mean it.

So, one night I was sitting on my couch, reading some cookbooks, when I came across a notebook my mom wrote for me.  In the best Christmas gift known to man, she hand wrote all my favorite recipes when I was a kid (and most of them will end up making an appearance on here).  Smack dab in the middle of the book was “Mexican Dip”.  The light bulb in my head went off!  I immediately ran to the store, and ended up buying enough for 1 1/2 batches (Hey, I had to make dinner!).

Long story short, I showed up at the party and it was gone in about an hour.  Ever since that fateful night, this dip has made an appearance at every party, BBQ, birthday, hangover day, and random night in between.

Without further adieu…here is the recipe!

IngredientsMexican Dip

1 31oz can refried beans (I use vegetarian but any variety will do)

2 medium avocados, pitted

8oz container sour cream

3/4c mayonnaise

1 package taco seasoning

1 16oz jar your favorite salsa (I like picante sauce since it’s smoother)

2c shredded cheddar cheese

1 bunch green onions

1 small can of sliced olives, drained

Directions:

Mix together the sour cream, mayonnaise and taco seasoning in a small bowl and set aside.

Mash together the avocado in another small bowl and set aside

Rinse and slice the green onion (white part and the bottom half of the green; I like to get a healthy handful

Layer the ingredients in a 9×13 baking dish (or any similar size platter) in the following order

Beans, avocado, creamy taco sauce, salsa, cheese, green onion, olive.

Bean and avocado layer*TIP* If you’re traveling with this dip (like I usually do), stop at the salsa layer.  Add the cheese, green onion and olives at your destination.

I tend to find the “scoop shaped” or “mini round” tortilla chips work better since this is a thick dip (especially the bean layer).  The best thing about this dip is you can make it your own.  Add tomato and onion, diced jalapeno for a bit of spice, pepper jack cheese, the possibilities are endless.

But for the love of god, do not substitute the mayo.  Not even for low fat, fat free, or any other dressing type sauce.  Trust me…you’ll thank me later.

Dip about 20 minutes after my friends got a hold of it

Dip about 20 minutes after my friends got a hold of it

Posted in Snacks | 1 Comment